
How to Build a Custom Workflow in Dynamics 365

You've been given the task of helping with your company's CRM, and they want automation, which a workflow process provides. If you are new to custom workflow activities, you've come to the right place.
Let's walk through the steps on how to build a custom workflow in Dynamics 365 (not to be confused with the more advanced Power Automate, which we'll go over in a later article).
Step 1 - What does the Customer Need?
This is the most important because if you have worked in IT for any length of time, knowing what the customer actually wants is crucial, and talking them through what the request entails will make your job so much easier down the road.
The customer tells you they want their sales department to call every lead that marketing gets entered in Dynamics 365. You tell them that a custom workflow activity can be created, which will generate a phone call activity for a new lead, and the phone call will be assigned to the appropriate sales rep. This way, activity is on the radar of the sales team, and calls can be made.
Your customer is ecstatic and wants to move forward.
Step 2 - Begin Our Custom Workflow build
Now that you have the customer needs and go ahead, it's time to get started with the build of our new workflow.
If you are not the system admin for D365, check with your admin to ensure you have permission to create workflow processes that can be shared with all users.
Once that is done, navigate to Settings, Advanced Settings, then Process.


Step 3 - Create a New Workflow
Click on New in the upper left of the menu.

Step 4 - Input Parameter for Workflow
We now have a new blank workflow open and some general information is required.
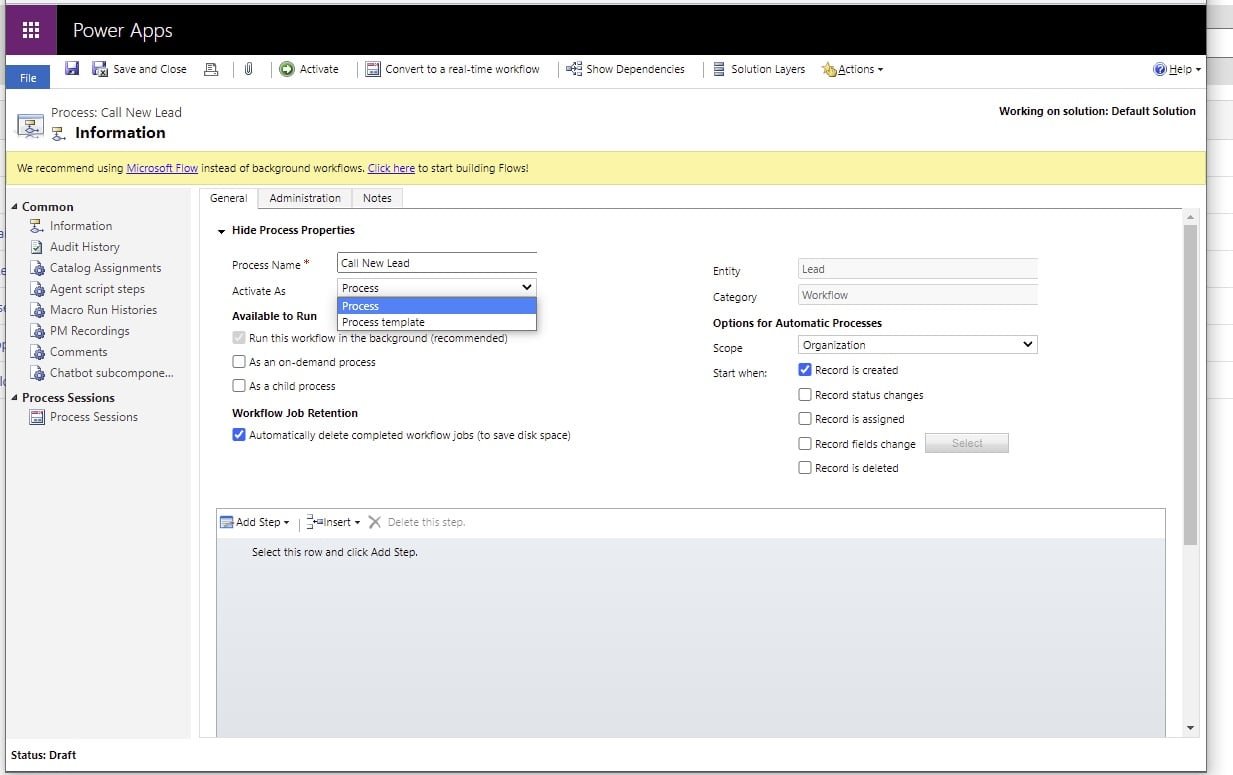
In Process Name, let's name it “Call New Lead.”
Next, Activate as "Process."
Leave the Available to Run set to “Run this workflow in the background.”
Entity will be Lead, as chosen from the pulldown and the category is Workflow.
Moving on the Options for Automatic Processes, our Scope will be the entire Organization in this instance. If, however, many departments operate in Dynamics 365, this workflow might only need to be shared with a particular business unit.
Start when will be as the customer requested, "Record is created."
Step 5 - Save and Add New Step to Workflow
Save your workflow by clicking on the disk in the upper left of the screen. We are huge proponents of saving work, as too many things have been lost as the result of a power outage, computer freezing, etc.
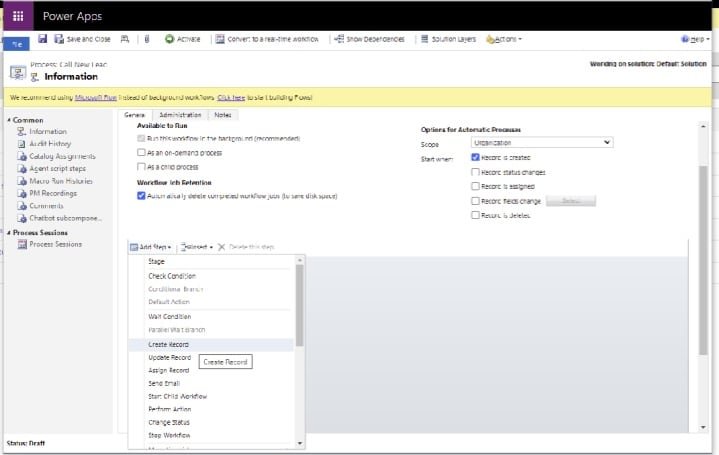
Once saved, click Add Step so we can begin putting some actions into our workflow. Click Create Record from the list that populates.
Step 6 - Set Parameters for Step
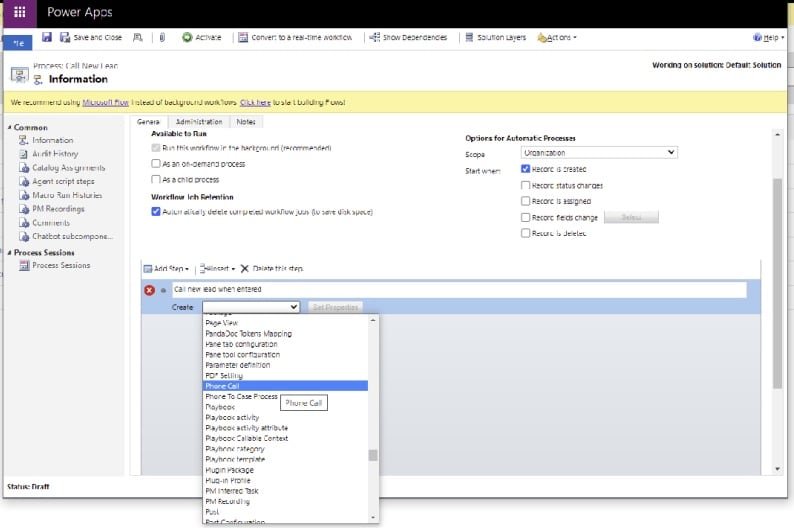
When a new step had been added, a text box appears which allows you to enter some information about the step.
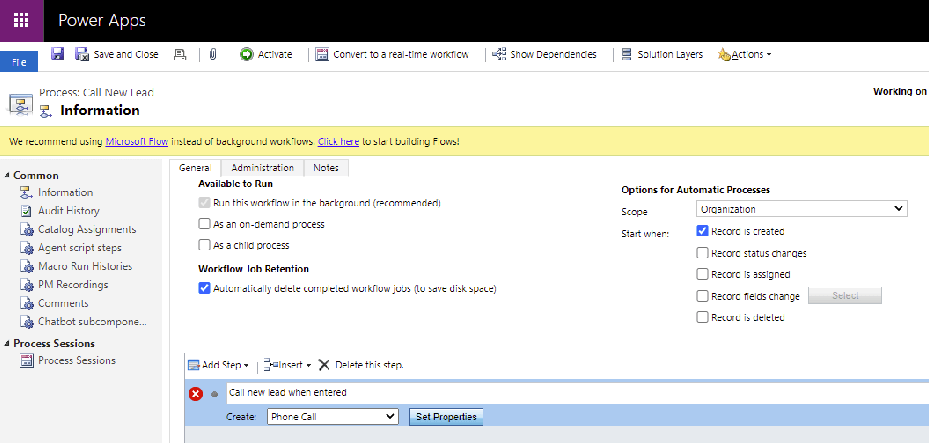
We have added, "Call new lead when entered." Click the pulldown by Create and select Phone Call.

Step 7 - Set Properties for Step
Click Properties to the right of Phone Call, and we will begin personalizing the phone call generated for a lead.
Step 8 - Add Business Logic & Custom Code
There are a few fields that are required and denoted with a red asterisk, so let's begin there.
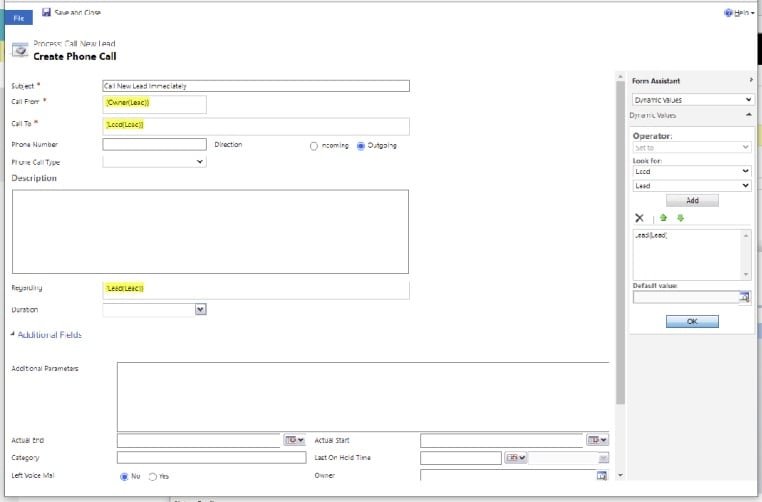
First, we enter a subject for the Phone Call which the sales team will see. It reads, "Call New Lead Immediately."
Next, we need to indicate who the call is from and the Form Assistant on the right makes this easy for us.
The following illustrates how we personalize the phone call activity.
Click within the Call From field. Using the pulldown below Lead on the right, we select the Field of Owner because that is the person who will be calling the lead, aka Call From.
Click Add below, which will add it as a potential field to add to the call.
Click OK and you see that the Owner {[Lead]} has been added to the field of Call From.

Now to populate Call To and using the same method described above, we choose Lead from the pulldown on the right, click Add, then OK which populates Call To with Lead{[Lead]}.
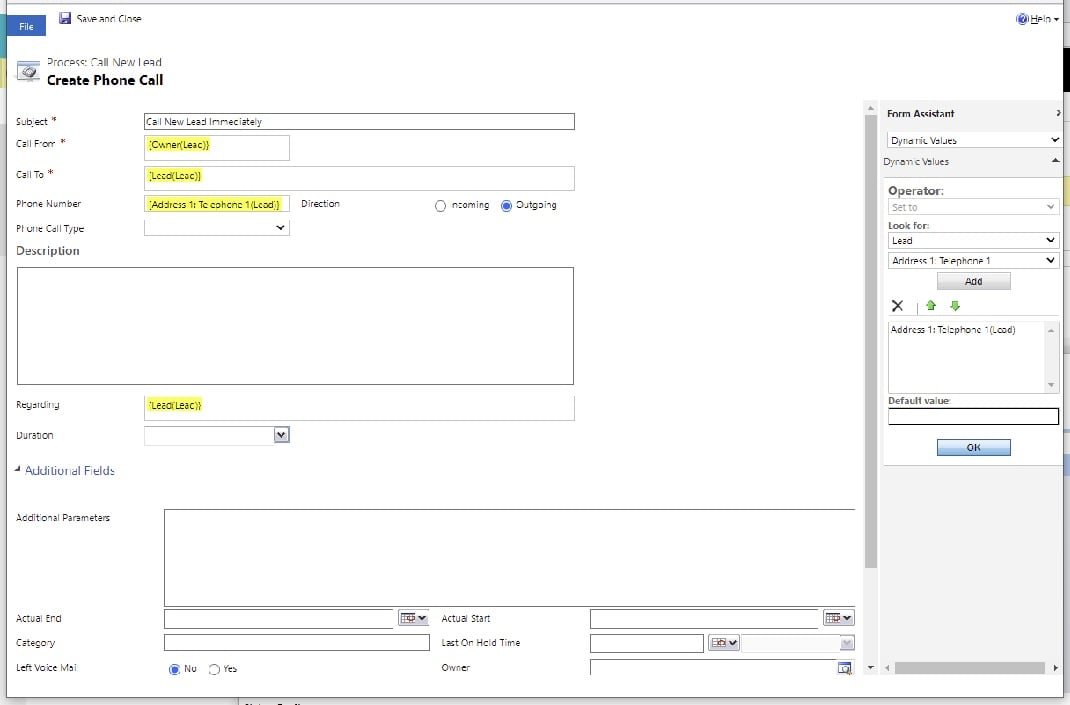
To make things easy on our sales team, let's add the phone number to the call.
The same method by choosing Address 1 Telephone 1 (or whatever field your lead has as the primary phone number), click Add, click OK, and Address 1 Telephone 1[Lead] populates in Phone Number.
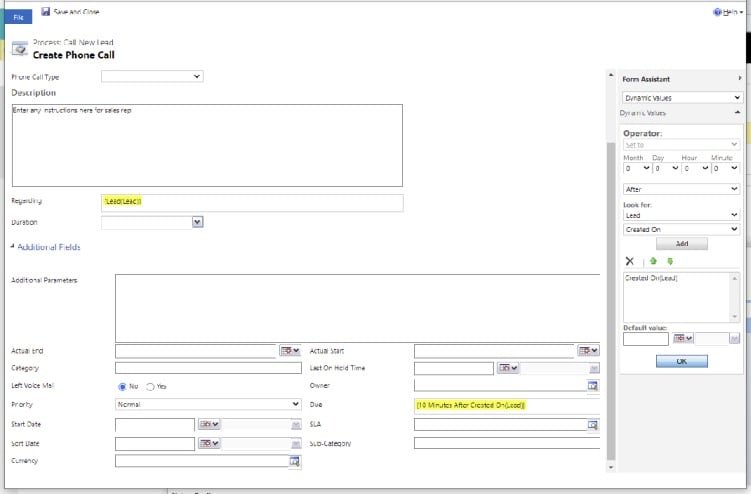
Now, we want to set a time that this phone call is due since our customer was insistent on when the leads should be contacted.
We scroll down in the phone call to the Due field and click within the field which will cause some new options to pop up under our Form Assistant.
We now have timeframe options and a pulldown that starts with After. We select 10 from the minute's pulldown, leave after as the default in the next field, and in the pulldown under Lead, leave the field as Created on, click Add, then OK.
We see now that Due is set for 10 Minutes After Created On [Lead].
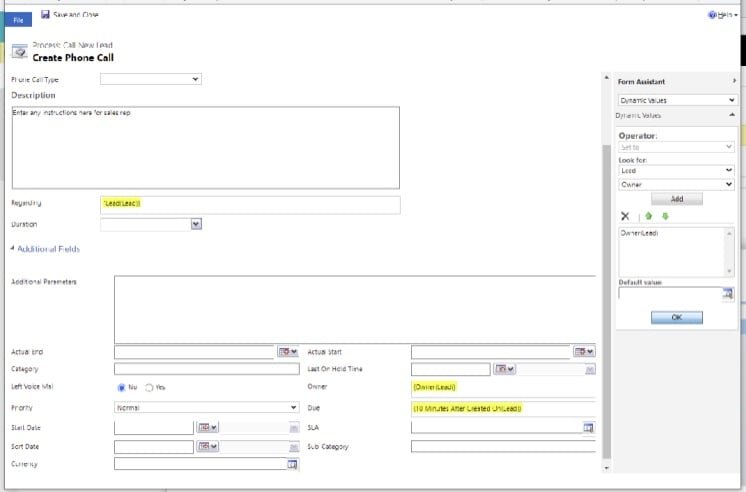
Lastly, we set the owner of the phone call to ensure the activity will show up for each sales team member.
Click in the Owner field, select Owner from the pull-down list of fields on the right, click Add, then OK.
We have now finished personalizing the phone call, so click Save and Close.
Step 9 - Activate & Execute!
We added some basic information to our workflow, added a step that created a phone call which we personalized for a good user experience.
Save the workflow again, and when you are ready, click Activate.

Now that the workflow is active, it's always good practice to test it prior to staff notification of it. We would create a new lead and see if a Phone call with the subject line of "Call New Lead Immediately" populates in the activities.
When it does, email your customer and prepare for more requests since they now know what you can do.
Check back with us for additional guides!