
Adding Epicor Custom Fields to Non-database EpiDataViews
As you are probably already familiar, adding an Epicor custom field (user-defined field) to database-driven EpiDataViews is pretty straight forward. For example, if you want to add a field called “PurchaseMe” to OrderDtl you would simply use Extended UD Table Maintenance to add the new field and BOOM there you have it. But what if when you go to this module and search for the EpiDataView name you can’t find it? This tutorial will walk you through overcoming that challenge. Let’s start with the intended outcome:
We want to add a new checkbox to the New PO Suggestions screen called “Expedite” that, when clicked can fire off any of the BPM-style events we know and love (fire off emails, pop up messages, etc).
So first things first, understand that the views in New PO Suggestions screen are not directly bound to any database table, rather they are constructed when the screen is loaded where Epicor has used code to pull all of the data together. So there is no field we can bind to and that means we need to make our own. We start by adding the unbound field via code within InitializeCustomCode:
((EpiDataView)oTrans.EpiDataViews["MtlSug"]).dataView.Table.Columns.Add("Expedite", typeof(bool));
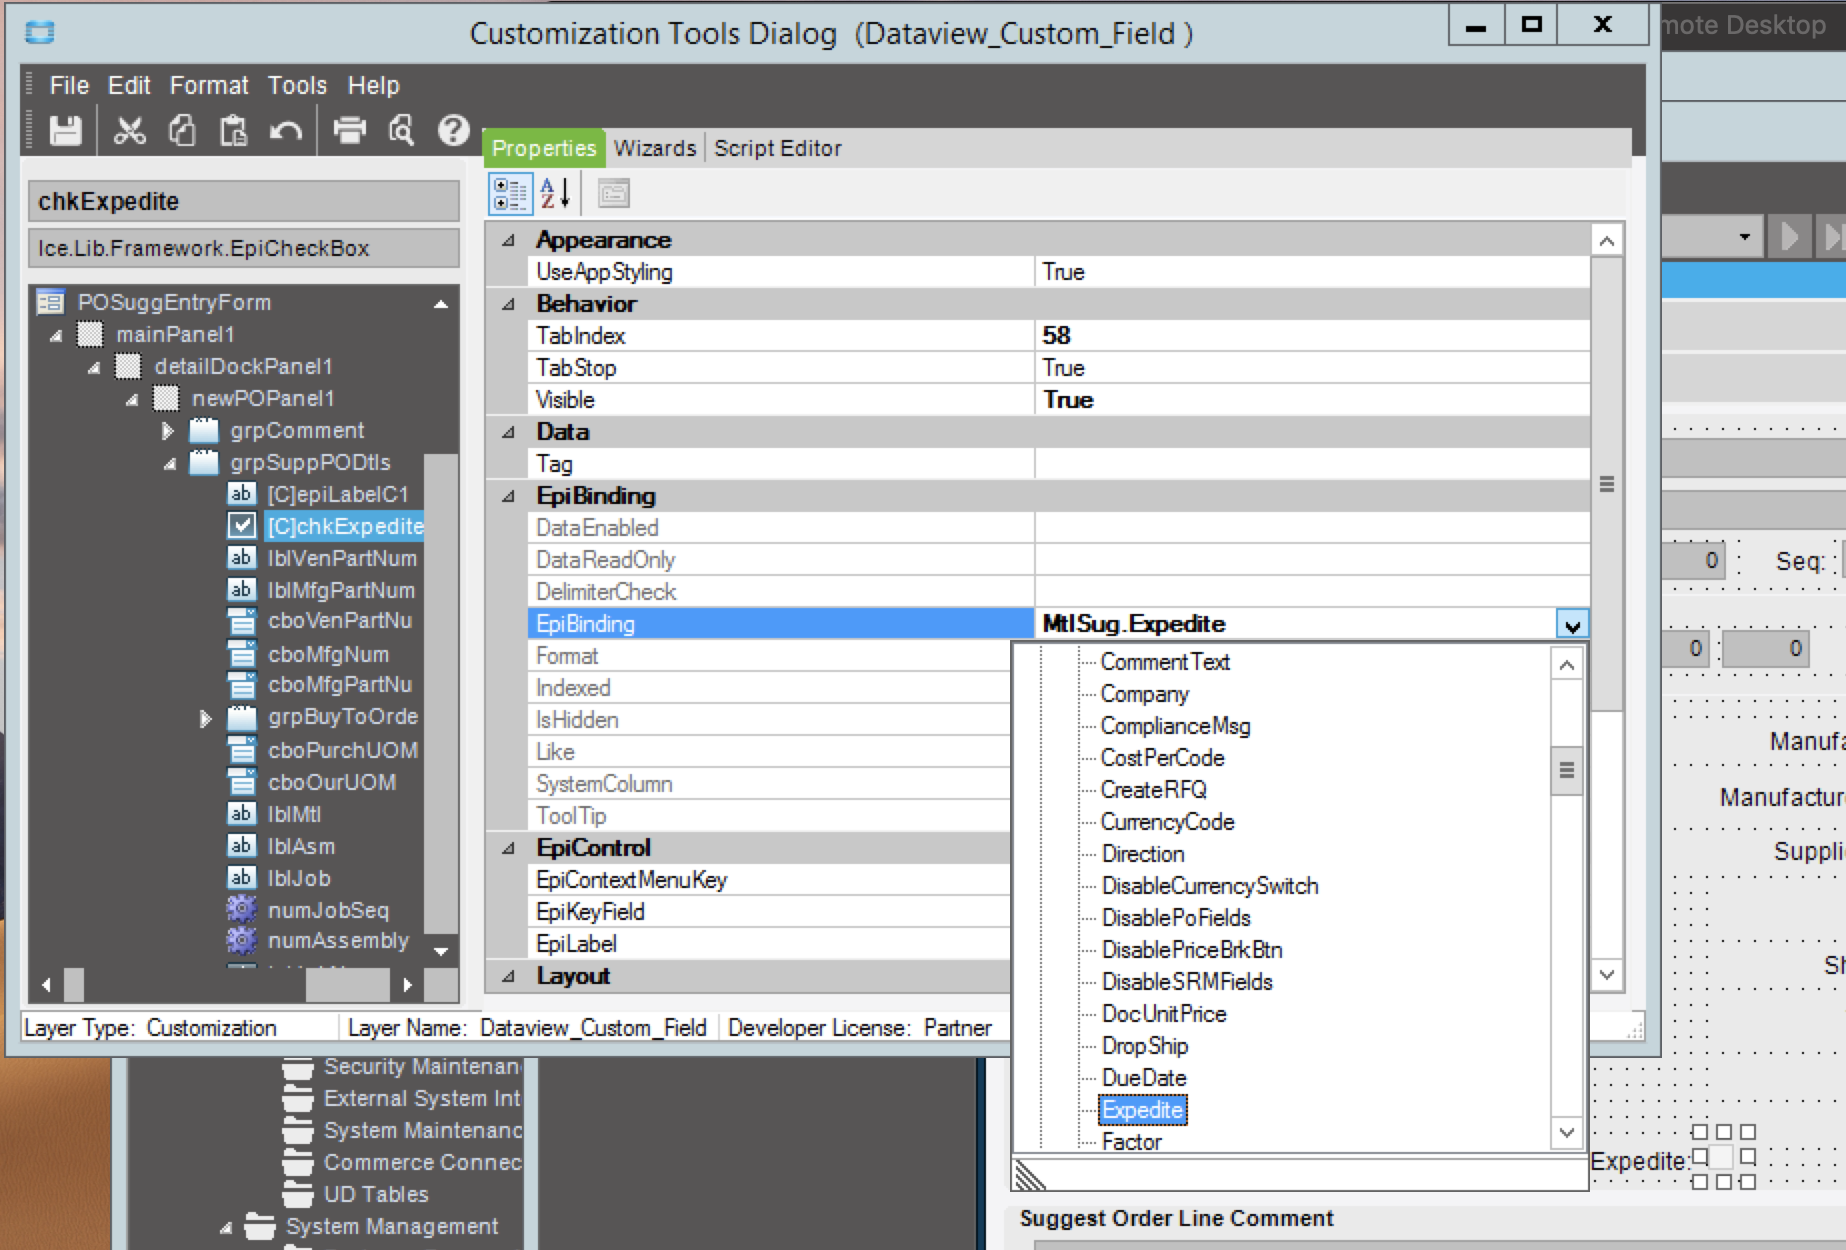
We have bolded the 3 things here you will need to be mindful to change. First is the view name - you can find this by using field help just as you always would to figure out what something is bound to. Next we have the name of your column. Lastly you define the type - here we are telling it to be a bool (Boolean) for use as a checkbox. Other choices might be string or int. Now with this one line of code in place save the customization and reload the form in customization mode with this saved customization. As you go to add this field to the form you will notice that it shows up just like any other field in that EpiDataView now:
What is interesting is that, even though this field isn’t actually bound to a database field, it will still automatically have the same validations of the other fields within the view. So, for example, if a record were disabled for some reason (think like a voided sales order) this field would be disabled as well. You can also use this field at this point for things like row rules or any of the other tools you might use to drive behavior. But until if has a way of putting data into it, it won’t do you any good so that brings us to the next step.
For the requirements of this article we don’t so much need this value read in from anywhere, we just need it to be available for use within a BPM. For that reason we are going to intercept changes to the EpiDataView and copy the value of this checkbox into CallContextBpmData. To do so, use the form event wizard to save you the work of setting up the EpiViewNotifications on MtlSug and CallContextBpm:

Don’t forget to click ‘Update Selected Event Code’ at the bottom right of the window for each.
Then update the generated code for edvMtlSug_EpiViewNotification to be something like this:
private void edvMtlSug_EpiViewNotification(EpiDataView view, EpiNotifyArgs args){if ((args.Row > -1)) {edvCallContextBpmData.dataView[edvCallContextBpmData.Row]["CheckBox01"] = edvMtlSug.dataView[edvMtlSug.Row]["Expedite"];}}
Now save the customization as we are all done here. The last step is to wire this up in a BPM:

Find the method using trace logging if you don’t know it off the top of your head.
In our simple example here we just have it doing a dummy pop-up on save but this could just as easily be kicking off emails, print jobs, EDI, other processes, you name it.
Hopefully this helped somebody out there. As always, if so please leave a comment. Also comment if you ran into any challenges. Lastly, if you’d prefer to just have somebody handle a project like this for you, please reach out to us!
